Getting Started
The BharatSim framework is written in Scala 2, so once the source code is obtained, a development environment needs to be set up. In this section, we will describe how to this can be done.
Setup Requirements
BharatSim requires:
A JDK (Java Development Kit)
A Scala Compiler and SBT (Scala Build Tool)
Installing JDK
BharatSim requires a version of Java that is less than Java 17. We recommend using either Java 8 or Java 11, either of which can be obtained from Oracle or OpenJDK.
Installing Scala with Coursier
Scala can be easily set up using coursier, the Scala application manager. The installation instructions for coursier can be found on the coursier site.
Once the cs binary is downloaded, run:
$ ./cs setup
To check whether the set up was successful, run:
$ scala -version
If the version number is not returned, reboot the system and try running the above line of code again.
Setting up an IDE and First Run
The recommended IDE for BharatSim is IntelliJ Idea. It provides many features helpful for newcomers to a language. It also handles large projects well.
However, the additional features of IntelliJ Idea make it slightly resource intensive. A faster alternative is Microsoft’s Visual Studio Code.
Here we will describe the setup process using both the IntelliJ Idea and VSCode IDEs. However, please note that the BharatSim code can just as well be edited using a simple text editor, and run with the Scala command line sbt tool, described further below. However, this method is not recommended for beginners.
IntelliJ Idea
Download the IntelliJ Idea Community Edition.
Note
On Linux, a .tar.gz file is downloaded.
Unzip the archive:
tar -xvf archivename.tar.gz.Go the unarchived folder. Run the
bin/idea.shfile to open IntelliJ Idea.
Go to File –> Settings [Or press
CTRL+ALT+S] to open the Settings Menu. Go to Plugins and search and install the Scala Plugin.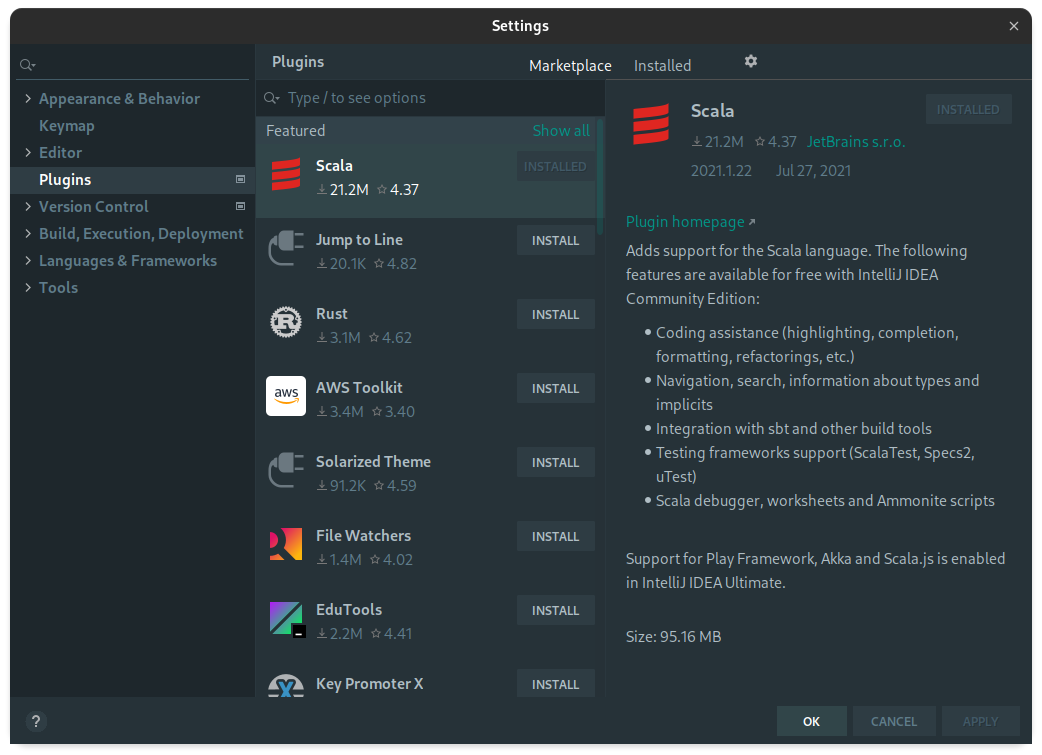
The IDE is now setup.
Let’s open the Project. The following steps are assuming the source code directory is named
BharatSim.Go to File –> Open, and select the
build.sbtfile in the BharatSim source code directory. Now, select Open as Project. IntelliJ Idea will load the project.Now, we will run the example The SIR Model that is included with the BharatSim source code.
In IntelliJ Idea, on the left is the project directory structure and tree. Navigate to
BharatSim/src/main/scala/com/bharatsim/examples/epidemiology/sirand open theMain.scalafile.There will again be a Green arrow/triangle besides the line containing
object Main. Click on it, andRun 'Main'.Error
If it gives an error like
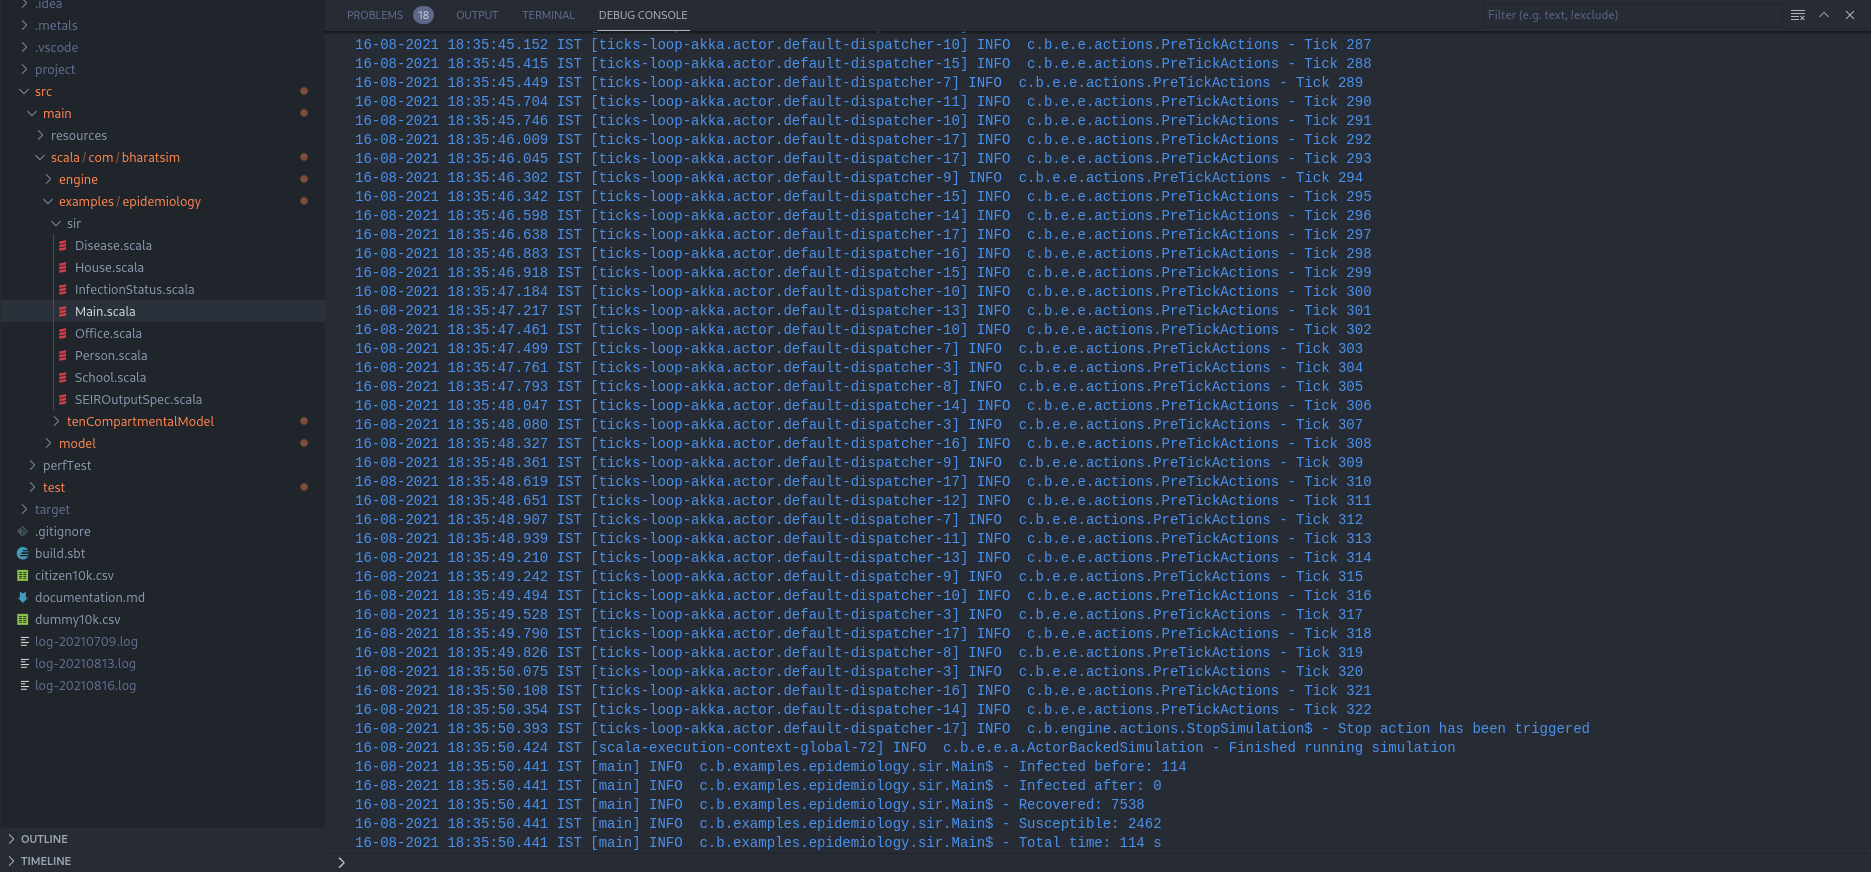
Ingestion Failed : java.nio.file.NoSuchFileException: citizen10k.csv, make sure there is a file namedcitizen10k.csvinside the BharatSim folder. If it is not present, it might have been mistakenly deleted or misplaced. Get the source code again in that case.Wait till the program finishes running. At the end, it should look like this:
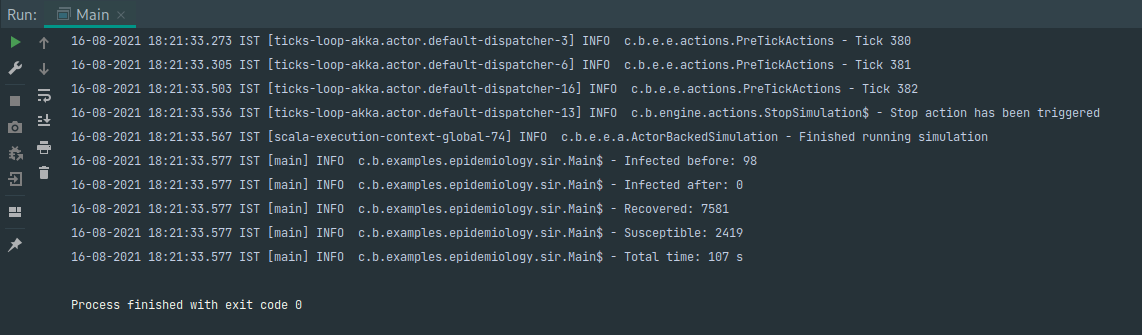
The output CSV file is present at
BharatSim/src/main/resources/output_unixtimestamp.csv. This contains the output as per the specification in the program. This can be used to further analyze the results of the SIR Model run.
If you reached till here, Congratulations! IntelliJ Idea is setup and working correctly.
Tip
If the green “Run” arrows do not appear, or some other issues occur and the program does not start to run due to failed dependencies or Scala versions, then there is a simple trick to try.
IntelliJ Idea stores its own configuration for the project inside a .idea directory in the project folder. Delete this folder, and start from scratch, by opening the build.sbt file again and then importing the project.
Visual Studio Code
Download the Visual Studio Code. Open VSCode.
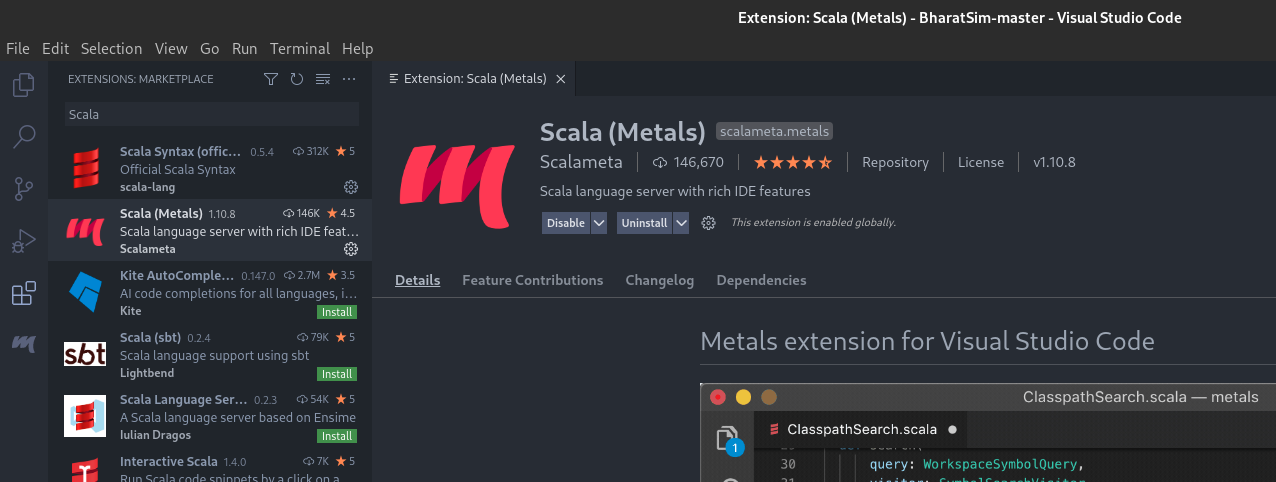
Go to View –> Extensions and search “Scala”. Install the Scala Syntax (official) and Scala (Metals) extensions.
Let’s open the Project. The following steps are assuming the source code directory is named
BharatSim.Go to File –> Open Folder, and select the
BharatSimfolder. When prompted by VSCode, click on Import Build. This uses an open source tool calledsbtto compile and test Scala projects.If you miss it somehow, go to View –> Command Palette [or press
CTRL+SHIFT+P] and search for “Import build”. Click on “Metals: Import build” and sit back for a while as VSCode goes through the project structure and builds the project. If you are unable to find such an option, make sure you installed the Metals extension. Restart VSCode if needed.Error
If there is an error notification during the import build process, click on the “more information” option. A new tab will open called Metal Doctor and it will display the source of the error. If the error is in Debugging, then the warning can be ignored and set up process can be carried on.
Now, we run the SIR Model. SIR is a simple compartmental model to analyze epidemics, where a person can be either Susceptible (S), Infected (I) or Recovered (R). We will see SIR Model in detail in the Epidemiology section.
In VSCode, on the left is the project directory structure and tree. Navigate to
BharatSim/src/main/scala/com/bharatsim/examples/epidemiology/sirand open theMain.scalafile.There will again be a
run | debugabove the line containingobject Main. Click onrun.Error
If it gives an error like
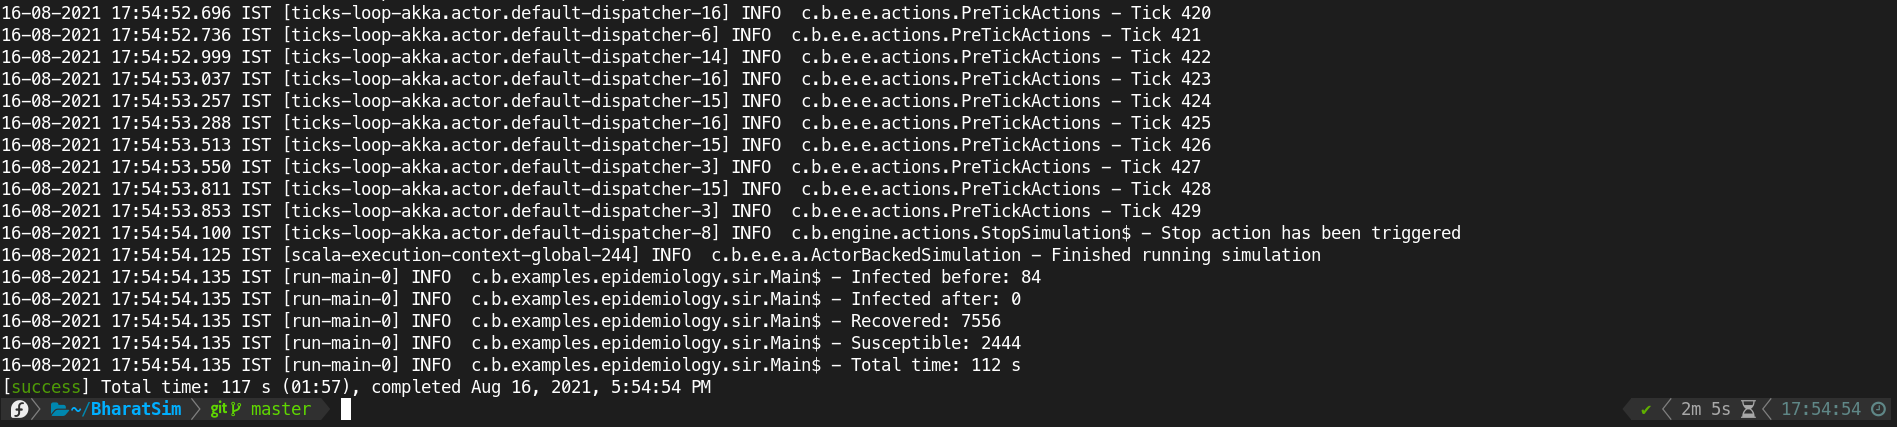
Ingestion Failed : java.nio.file.NoSuchFileException: citizen10k.csv, make sure there is a file namedcitizen10k.csvinside the BharatSim folder. If it is not present, it might have been mistakenly deleted or misplaced. Get the source code again in that case. If the problem persists, then copy thecitizen.csvand place it in the main folderBharatSim.Wait till the program finishes running. At the end, it should look like this:
The output CSV file is present at
BharatSim/src/main/resources/output_unixtimestamp.csv. This contains the output as per the specification in the program. This can be used to further analyze the results of the SIR Model run.
If you reached till here, Congratulations! VSCode is setup and working correctly.
Running Scala on Command Line
Let’s assume the source code directory is named BharatSim. Navigate to the directory in terminal. The sbt tool is often utilized to build a project, which is nothing but compiling, running and testing the project. It also offers the capability of executing each of these processes individually.
Compile the project:
$ sbt compile
Now, we run the SIR Model. SIR is a simple compartmental model to analyze epidemics, where a person can be either Susceptible (S), Infected (I) or Recovered (R). We will see SIR Model in detail in the Epidemiology section.
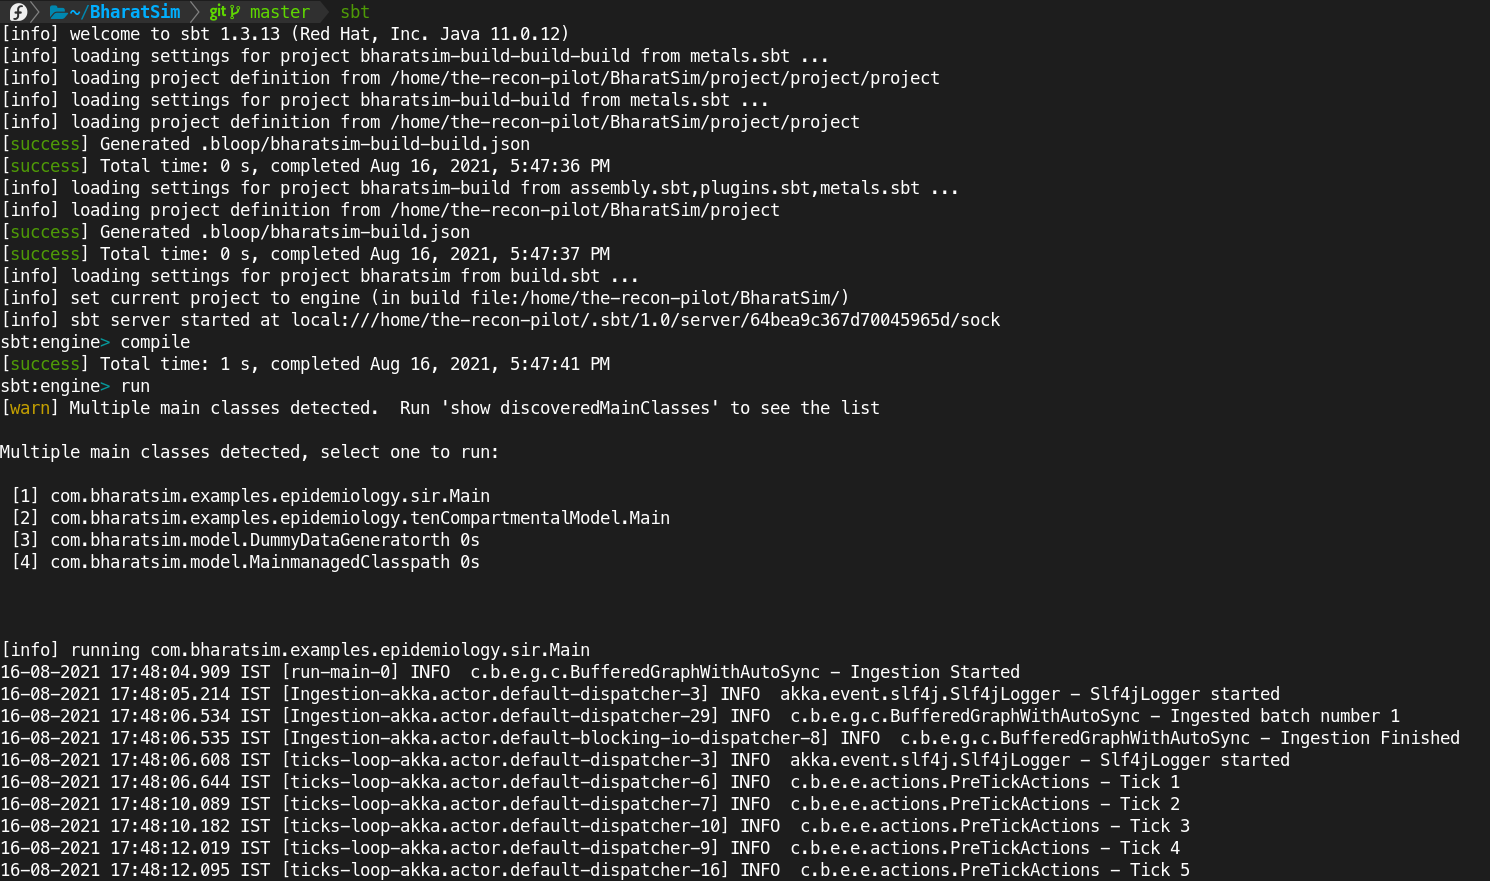
Do
sbt runand wait for a still of main classes to appear on the screen. Select the class number associated tocom.bharatsim.examples.epidemiology.sir.Main. It may appear as if the class number is not being typed, but it is! Just input the number and press ENTER . It should start running the simulation.Error
If it gives an error like
Ingestion Failed : java.nio.file.NoSuchFileException: citizen10k.csv, make sure there is a file namedcitizen10k.csvinside the BharatSim folder. If it is not present, it might have been mistakenly deleted or misplaced. Get the source code again in that case. If the problem persists, then copy thecitizen.csvand place it in the main folderBharatSim.It should look like this:
The output CSV file is present at
BharatSim/src/main/resources/output_unixtimestamp.csv. This contains the output as per the specification in the program. This can be used to further analyze the results of the SIR Model run.
This is how Scala programs can be run through the command line.
Tip
Another way to operate Scala through the command line is to simply type sbt and run the sbt console. The other commands can now be run in succession simply as compile, run and more.